Sunday 25 December 2011

Domesticity Biscuits

This recipe is from Nigella's How to be a Domestic Goddess. When she says they have the perfect combination of holding their shape and tastiness she ain't fibbin'. Despite not having quite the incredible selection of cookie cutters as Nigella, I've made these a few times for different occasions - namely Halloween and Christmas (as you'll probably be able to tell) - and will, in all likelihood, be making them for a few more... 


This makes a huge amount, so depending on the number you're baking for/how hungry they are/how many they can shove in their mouth at one time, you can adjust the quantities - halving it is pretty simple (even more so with a calculator...). The 1950's alternative is to go for the whole caboodle and keep half the dough in the freezer ready to whip out, roll out and pop into the oven at the drop of a bowler hat. Then, sit back (or very upright with your cup, saucer and little finger out) and revel in the ease of the domination of domesticity.   


175g Softened Butter
200g Caster Sugar
2 Eggs
1 Tsp Vanilla Extract
400g Plain Flour (Plus Extra for Rolling)
1 Tsp Baking Powder
1/4 Tsp Salt

Cream the butter and sugar together well, until paler in colour, then gradually beat in the eggs and vanilla - add a bit of the flour if it curdles. Sift together the flour, baking powder and salt into the butter/sugar/egg mixture and bring it all together to make a dough. Try to handle/knead it as little as possible. Wrap it in cling film let it have a half hour nap in the fridge in a cling-film blanket before waking it up with the back of a rolling pin and the cookie cutters of your choice. Bake for about ten minutes at 180 degrees on a greaseproof paper lined baking sheet (definitely necessary here unless you want to spend a good few hours icing crumbs together) until just turning nicely golden brown. 

Icing: a nice thick water icing (AKA a mixture of icing sugar and a liiiittle bit o' water) does nicely.


Variations: This is the basic/original recipe and while it does not really require a variation, sometimes it's nice to mix things up a bit. Add a bit of lemon or orange zest to the dough, or use almond extract or orange water instead of vanilla extract. The icing can be varied too with the use of extracts or juices instead of water and the addition of food colouring. Although I haven't tried these (yet), I also can't see anything wrong with adding nuts, dried fruit or chocolate to the dough... The possibilities may, or may not be, endless. 


Sunday 18 December 2011

Birthday Cake Hall of Fame No. 1

Baking doesn't get more exciting than birthday cakes. Wedding cakes, as great as they look, just don't come round often enough and look more stressful than anything else. And there's also no room for redemption in a years time if you know what I mean. 


In no particular order (and baring in mind there is a large backlog and a few exciting birthdays coming up...):


1. My sister made this many years ago for a pizza loving friend. White and pink coloured icing for the "pizza" base and sauce, sweeties for the toppings, and grated white chocolate for the cheese. And I'm pretty sure it was on a pizza plate as well.  


2. Spending a year (and a birthday) on the other side of the world was exciting, but having this incredible chocolate orange cake, made by my very very good friend Mad-dog Gates, on my 21st birthday made it feel much more like home. I will never forget waking up with a horrific hangover and shoving two massive slices of this down my throat. I can't say it made me feel better, but it definitely made me feel happier. 


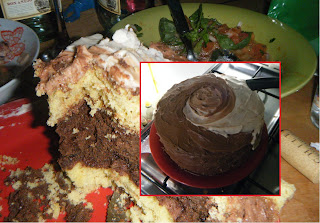
3. Later that same year, I made this for my amazing house-mate, Margarita, on her 26th Birthday. It is two layers of almond sponge on either side of a chocolate and chocolate chip sponge layer. The icing is Nutella-Cream cheese butter icing (with varying degrees of Nutella), with an extra layer of pure Nutella between the sponge layers. We started singing happy birthday without the Birthday Girl (half-way through the second attempt she appeared) and all she got to taste of it in the end was the bit she ate when they thrust her face in the cake, after she had blown out her candles (a Chilean tradition). In any case, it disappeared incredibly quickly, which is never a bad sign. 


4. My sister made me this for my 19th birthday, combining two of my favourite things - peanut butter and jam. The icing is peanut butter and it is covered in peanut-butter and jam jewel biscuits from Nigella's Domestic Goddess. It had Jam between the sponge layers too. 


5. To conclude the first Hall of Fame, this has yet to be topped in my opinion. Made by my sister for my 18th Birthday, it is 3 chocolate sponge layers, with peanut butter cream and chocolate peanut butter icing, surrounded by a sheet of milk and white chocolate, and topped with glitter covered peanut butter lindt chocolates and a frosted rose (which I did actually eat). It was GREAT warmed up.


WHOOPIE (I made) PIES

Whoopie Pies have been around for a while but have just never quite managed to live up to the hype... Probably because they're just never going to be quite as pretty as a dainty little cupcake. They're more manly - a little like the concept behind Coke Zero perhaps. But not quite manly enough to become  popular with actual men. 

They're an odd mix between a cake and a macaroon, and while they travel well, it's a bit of a struggle to make them look nice enough to present to someone for a special occasion. Mind you, often the novelty makes up for that. 


Out of the 3 I've tried making from the Hummingbird Cake Days book, probably the nicest are the Red Velvet ones, but like all things Red Velvet they're an effort. These chocolate ones are a bit less of a faff, but still taste wunderbar. The vanilla and cardamom ones were pretty ace too - nice and chic for fancy occasions. 

The sponge is surprisingly not very sweet. But the riciculously sweet innards make up for that... The icing uses Marshmallow Fluff, which, being in the UK, isn't the easiest to find. I just found some in Selfridges and got quite excited - I have used melted marshmallows in the past though and as long as theyre quite cool (add a teeny bit of water to stop them solidifying again) when you add them to the icing sugar and butter mixture it works quite well. Make sure you give it a good while in the fridge before you ice them too. 


Sponge:
1 Egg
150g Caster Sugar
125g Natural Yoghurt
25ml Milk
1/4 Tsp Vanilla Essence
75g Butter, Melted
200g Plain Flour
80g Cocoa Powder
3/4 Tsp Bicarbonate of Soda
1/4 Tsp Baking Powder

Icing:
170g Butter
280g Icing Sugar
220g Marshmallow Fluff

Beat the egg and sugar until pale and fluffy, then mix the milk, yoghurt and vanilla together and chuck that in with the egg and sugar. Stir in the melted butter. Sift together the rest of the dry ingredients and add that in two batches, making sure its all mixed in. Leave to set for half an hour in the fridge. 

Heat the oven to 170 degrees C, and blob the mixture onto a baking sheet covered in greaseproof paper (which is definitely necessary). Make the blobs any size you want, the only important thing is to keep them all the same size and shape so they fit together when they're cooked - I like them quite small. Tiny bite-size ones would be great for a party - the less effort to get them in your gob (without getting crumbs all down your gown) the better I say. 

Cook until they're springy on top (10-15 minutes). 


For the icing, mix the icing sugar and butter until well combined then stir in the Marshmallow fluff. If you've got a machine (or someone you can use as a machine) this is good as it is much easier said than done. Marshmallow fluff is shockingly stiff. Who knew sugar could be so unforgiving. If you don't have a machine to hand, it is possible to do this by hand, and if done on a regular basis works nicely towards that Rafael Nadal look (check out his arms if you don't know what I mean...).

The icing will probably now be stiff enough to prop up the majority of your kitchen cutlery - if it isn't, pop it in the fridge for a bit. 


Then all that is left is to sandwich two chocolate blobs together with some of the icing. Don't be shy with the icing - there is a LOT here. I also like to spread some jam on one side too to liven them up a bit. 

Happy Whoopie.

Friday 16 December 2011

Party In Your Mouth (AKA Doughnut Muffins)

Doughnut. Good. Muffin. Good. 


Made these a couple of times recently and they've gone down a treat. Not as guilty making or as much effort as a proper donut, more exciting than a boring plain muffin,  and they travel WAY better than their cupcake sisters - can cram more in a box yanoo. That's if you want to give them away... Even those who don't like actual doughnuts (i.e. crazy people) love these bad boys. 

The recipe is from Nigella's domestic goddess. She says to use strawberry jam, but any good strong jam will do. I like raspberry. Good way to use up old jam too (I like making up ridiculous excuses to do a bit of baking. Too much sugar in the house? Baaaake)

Makes 12 (just)

Batter:
125ml Milk
85ml Corn/Vegetable Oil
1 Egg
1/2 tsp Vanilla Extract
200g Self-raising Flour
100g Caster Sugar
12 Tsps Jam

Coating:
100g Butter
150g Granulated Sugar

Two bowls: one with the dry ingredients mixed together and one with the wet ingredients beaten together. Pour the wet ingredients into the dry ones and mix until just combined. Don't overbeat - people like tough cookies but not tough muffins. Lumps are good. 
Fill the really well greased muffin cups to a half full. (Don't use paper cases) Dollop a little bit of jam in each one - Nigella says the size of a fat broad bean - and then cover with a bit more mix so the muffin cups are just over 3/4 full. Bake at 190 degrees C for about 20 mins until the tops are turning golden brown and are "springy and resistant".  

As they're cooking melt the butter and put the granulated sugar on a plate or shallow bowl.

As soon as the muffins are out of the oven, carefully take them out of the muffin tins and roll each one in the butter then the sugar. Don't worry if the bottom of the muffin splits a bit and the jam pops out a bit - just pop it back in. There's nothing a good bath in butter and sugar can't solve. 


Daa Daaaaaaaaaaaa.

Curly Wurlys make great fences.

As it's coming up to Christmas, it seems appropriate to encourage Gingerbread house making. As well as gingerbread house eating. Eating of all kinds really... 


Gingerbread houses can get a bit fiddly, but the great thing about making a gingerbread house compared to making a real house, is when it goes a bit wrong you can eat the evidence. Mmmm. Edible brick.


Make them for your friends to eat or to live in. It all depends on your friends. 


Here are some I made earlier... (Blue Peter styleee)


Making the actual gingerbread is probably the least fun part of the whole process, but its not hard. I can't remember the actual recipe I used for these two, but I seem to remember it was a bit rock solid anyway so no big loss... Mind you, there's nothing wrong with licking the icing and sweets off some rock solid gingerbread so I wouldn't worry toooo much. It's all about the aesthetics with this. 

There are loads of recipes for ginger bread around (I found this one on bbcgoodfood.com) so I'd say just wap it into google innit. 

250g unsalted butter
200g dark muscovado sugar
7 tbsp golden syrup
600g plain flour
2 tsp bicarbonate of soda
4 tsp ground ginger

Melt the butter, sugar and golden syrup together and pour this into the dry ingredients and mix to get a slammin dough. Add a little water if you need to/want to. Roll it out with a rolling pin (or bottle of wine), but remember we're going to be building with it so leave it quite thick (the bbc says thickness of two pound coins ooooh). Cut out your templates (see comments below) and bake in a hot oven (200 degrees C) for about 12 minutes. Or until they've firmed up and slightly brown around the edges. Then let cool and construct!

Templates: These can be as simple or as elaborate as you want. Anything from two rectangles and two triangles to a load of tiny pieces to make a whole castle. You know your time and patience better than me. What I would say, though, is make paper templates first and check they fit together before cutting them out of your dough. The dough can change shape a little in the oven too so don't be upset if that happens. That's what the icing is for. 

The icing: I usually just go for a standard water icing (icing sugar with a bit of water...), but make sure it's quite stiff. No-one likes dribbly cement. 

The last part is the fun bit. Eat Add the sweets. Curly-wurly's make great fences. 

Sugar high 'r' us. 

A Messy Beginning

Birthdays are always a good place to start. This is the cake we made my friend Lucy for her 17th birthday maaany years ago. We're pretty sure this is what made her stop eating sugar for the next few years...


It's layers of vanilla sponge of varying colours, with layers of sliced vanilla and jam swiss roll, chocolate swiss roll and jammy dodgers. We then smothered the whole thing in coloured lemon icing, sweets and silver balls. Getting this in the car and getting to her house (not far) was veeeery interesting. But it was a good party. And the proof is that the cake ended up like this:


Demolished.